HTML igre
| Sitio: | CARNET Loomen LMS |
| Curso: | Skriptni jezici i web programiranje 4TR2 |
| Libro: | HTML igre |
| Imprimido por: | Invitado |
| Día: | Saturday, 27 de June de 2026, 12:37 |
1. Grafičko sučelje igre
HTML igrice su izrađene uz pomoć elementa <canvas>. Canvas je savršen za jednostavne igrice. On će nam služiti kao prostor u kojem će se igrica odvijati. <Canvas> element ima ugrađeni objekt pod imenom getContext(“2d”), on sadrži metode i svojstva za crtanje.
Primjer:
function startGame() {
myGameArea.start();
}
var myGameArea = {
canvas : document.createElement(“canvas”),
start : function() {
this.canvas.width = 480;
this.canvas.height = 270;
this.context = this.canvas.getContext(“2d”);
document.body.insertBefore(this.canvas, document.body.childNodes[0]);
}}

Funkcija startGame() poziva metodu start() na myGameAreaobjekt.
start() metoda stvara <canvas> element i unosi ga kao prvi čvor u <body> elementu.
HTML element canvas koristi se za crtanje grafika na web stranici, koristi se za crtanje grafike u hodu putem skriptiranja u JavaScriptu.2. Komponente igre
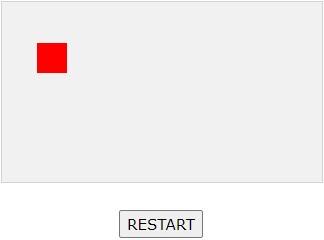
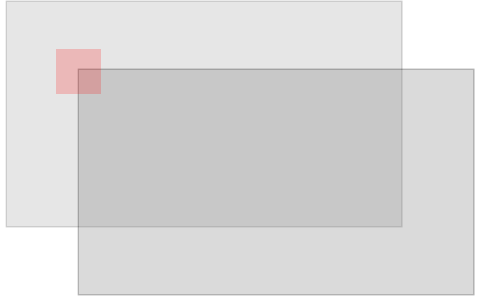
Dodavanje crvenog kvadrata na područje igre:
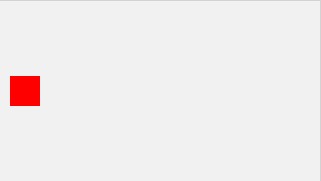
Za dodavanje komponenata igre, moramo napraviti konstruktor komponenata. Objekt konstruktora se zove component.
Komponente imaju svojstva I metode upravljanja njihovog izgleda i pokreta.
var myGamePiece;
function startGame() {
myGameArea.start();
myGamePiece = new component(30, 30, “red”, 10, 120);
}
function component(width, height, color, x, y) {
this.width = width;
this.height = height;
this.x = x;
this.y = y;
ctx = myGameArea.context;
ctx.fillStyle = color;
ctx.fillRect(this.x, this.y, this.width, this.height);
}
Da bismo igru pokrenuli, ažurirat ćemo prikaz 50 puta u sekundi (povećanjem ovog broja dobivamo bolju fluidnost prikaza ali gubimo na performansama).
Prvo ćemo stvoriti novu funkciju koja se zove updateGameArea().
U myGameAreaobjekt dodajte interval koji će pokretati updateGameArea() funkciju svake 20-e milisekunde (50 puta u sekundi). Također dodajmo funkciju koja zove clear(), koja briše cijeli canvas.
U component konstruktor dodajte funkciju koja se zove update() za rukovanje crtežom komponente.
updateGameArea() funkcija naziva clear() i na update() metode.
canvas : document.createElement(“canvas”),
start : function() {
this.canvas.width = 480;
this.canvas.height = 270;
this.context = this.canvas.getContext(“2d”);
document.body.insertBefore(this.canvas, document.body.childNodes[0]);
this.interval = setInterval(updateGameArea, 20);
},
clear : function() {
this.context.clearRect(0, 0, this.canvas.width, this.canvas.height);
}
}
function component(width, height, color, x, y) {
this.width = width;
this.height = height;
this.x = x;
this.y = y;
this.update = function(){
ctx = myGameArea.context;
ctx.fillStyle = color;
ctx.fillRect(this.x, this.y, this.width, this.height);
}
}
function updateGameArea() {
myGameArea.clear();
myGamePiece.update();
}
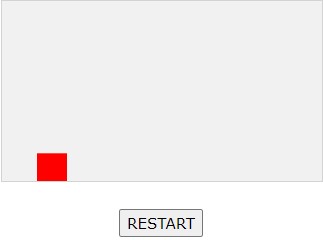
Da bismo dokazali da se crveni kvadrat crta 50 puta u sekundi, promijenit ćemo položaj x (vodoravno) za jedan piksel svaki put kada ažuriramo područje igre:
function updateGameArea() {
myGameArea.clear();
myGamePiece.x += 1;
myGamePiece.update();
}
Koristimo clear() metodu kako svi pokreti komponente nebi ostavili trag mjesta na kojem su bila smješteni u posljednjem frameu.
Koristimo x- i y-koordinate za pozicioniranje komponenata na područje igre.
3. Kontroleri
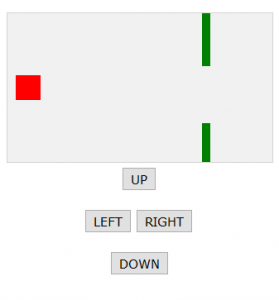
Sada želimo kontrolirati crveni kvadrat. Dodajemo četiri gumba, gore, dolje, lijevo i desno.
Pravimo dva nova svojstva u component konstruktoru koje nazovemo speedX i speedY. Ta se svojstva koriste kao indikatori brzine.
Dodajemo funkciju u component konstruktora,koja se zove newPos(), koja koristi speedX i speedY svojstva za promjenu položaja komponente. Funkcija newPos() poziva se iz funkcije updateGameArea prije crtanja komponente.
<script>
function component(width, height, color, x, y) {
this.width = width;
this.height = height;
this.speedX = 0;
this.speedY = 0;
this.x = x;
this.y = y;
this.update = function() {
ctx = myGameArea.context;
ctx.fillStyle = color;
ctx.fillRect(this.x, this.y, this.width, this.height);
}
this.newPos = function() {
this.x += this.speedX;
this.y += this.speedY;
}
}
function updateGameArea() {
myGameArea.clear();
myGamePiece.newPos();
myGamePiece.update();
}
function moveup() {
myGamePiece.speedY -= 1;
}
function movedown() {
myGamePiece.speedY += 1;
}
function moveleft() {
myGamePiece.speedX -= 1;
}
function moveright() {
myGamePiece.speedX += 1;
}
</script>
<button onclick=”moveup()”>UP</button>
<button onclick=”movedown()”>DOWN</button>
<button onclick=”moveleft()”>LEFT</button>
<button onclick=”moveright()”>RIGHT</button>

4. Prepreke u igri
Dodajemo novu komponentu u područje igre. Neka bude zelena, široka 10 piksela, visoka 200 piksela, i postavljamo je 300 piksela udesno i 120 piksela prema dolje. Ne smijemo zaboraviti ažurirati svaku prepreku kako ne bih došlo do ne pomicanja prepreka.
var myGamePiece;
var myObstacle;
function startGame() {
myGamePiece = new component(30, 30, “red”, 10, 120);
myObstacle = new component(10, 200, “green”, 300, 120);
myGameArea.start();
}
function updateGameArea() {
myGameArea.clear();
myObstacle.update();
myGamePiece.newPos();
myGamePiece.update();
}
Kako bismo igru učinili zanimljivijom poželjno je napraviti da se igra završi kada kvadratićem udarimo u prepreku, to ćemo napraviti na slijedeći način:
var myGameArea = {
canvas : document.createElement(“canvas”),
start : function() {
this.canvas.width = 480;
this.canvas.height = 270;
this.context = this.canvas.getContext(“2d”);
document.body.insertBefore(this.canvas, document.body.childNodes[0]);
this.interval = setInterval(updateGameArea, 20);
},
clear : function() {
this.context.clearRect(0, 0, this.canvas.width, this.canvas.height);
},
stop : function() {
clearInterval(this.interval);
}
}
function component(width, height, color, x, y) {
this.width = width;
this.height = height;
this.speedX = 0;
this.speedY = 0;
this.x = x;
this.y = y;
this.update = function() {
ctx = myGameArea.context;
ctx.fillStyle = color;
ctx.fillRect(this.x, this.y, this.width, this.height);
}
this.newPos = function() {
this.x += this.speedX;
this.y += this.speedY;
}
this.crashWith = function(otherobj) {
var myleft = this.x;
var myright = this.x + (this.width);
var mytop = this.y;
var mybottom = this.y + (this.height);
var otherleft = otherobj.x;
var otherright = otherobj.x + (otherobj.width);
var othertop = otherobj.y;
var otherbottom = otherobj.y + (otherobj.height);
var crash = true;
if ((mybottom < othertop) ||
(mytop > otherbottom) ||
(myright < otherleft) ||
(myleft > otherright)) {
crash = false;
}
return crash;
}
}
function updateGameArea() {
if (myGamePiece.crashWith(myObstacle)) {
myGameArea.stop();
} else {
myGameArea.clear();
myObstacle.update();
myGamePiece.newPos();
myGamePiece.update();
}
}
var myGameArea = { function everyinterval var myGamePiece; function updateGameArea() {
canvas : document.createElement(“canvas”),
start : function() {
this.canvas.width = 480;
this.canvas.height = 270;
this.context = this.canvas.getContext(“2d”);
document.body.insertBefore(this.canvas, document.body.childNodes[0]);
this.frameNo = 0;
this.interval = setInterval(updateGameArea, 20);
},
clear : function() {
this.context.clearRect(0, 0, this.canvas.width, this.canvas.height);
},
stop : function() {
clearInterval(this.interval);
}
} {
if ((myGameArea.frameNo / n) % 1 == 0) {return true;}
return false;
}
var myObstacles = [];
function updateGameArea() {
var x, y;
for (i = 0; i < myObstacles.length; i += 1) {
if (myGamePiece.crashWith(myObstacles[i])) {
myGameArea.stop();
return;
}
}
myGameArea.clear();
myGameArea.frameNo += 1;
if (myGameArea.frameNo == 1 || everyinterval(150)) {
x = myGameArea.canvas.width;
y = myGameArea.canvas.height – 200
myObstacles.push(new component(10, 200, “green”, x, y));
}
for (i = 0; i < myObstacles.length; i += 1) {
myObstacles[i].x += –1;
myObstacles[i].update();
}
myGamePiece.newPos();
myGamePiece.update();
}
var x, height, gap, minHeight, maxHeight, minGap, maxGap;
for (i = 0; i < myObstacles.length; i += 1) {
if (myGamePiece.crashWith(myObstacles[i])) {
myGameArea.stop();
return;
}
}
myGameArea.clear();
myGameArea.frameNo += 1;
if (myGameArea.frameNo == 1 || everyinterval(150)) {
x = myGameArea.canvas.width;
minHeight = 20;
maxHeight = 200;
height = Math.floor(Math.random()*(maxHeight-minHeight+1)+minHeight);
minGap = 50;
maxGap = 200;
gap = Math.floor(Math.random()*(maxGap-minGap+1)+minGap);
myObstacles.push(new component(10, height, “green”, x, 0));
myObstacles.push(new component(10, x – height – gap, “green”, x, height + gap));
}
for (i = 0; i < myObstacles.length; i += 1) {
myObstacles[i].x += –1;
myObstacles[i].update();
}
myGamePiece.newPos();
myGamePiece.update();
}
5. Dodavanje rezultata za igru
Prvo ćemo izraditi komponentu za računanje bodova:
var myGamePiece;
var myObstacles = [];
var myScore;
function startGame() {
myGamePiece = new component(30, 30, “red”, 10, 160);
myScore = new component(“30px”, “Consolas”, “black”, 280, 40, “text”);
myGameArea.start();
}
Sintaksa za pisanje teksta na elementu platna razlikuje se od crtanja pravokutnika. Stoga moramo pozvati konstruktor komponente pomoću dodatnog argumenta, govoreći konstruktoru da je ova komponenta tipa “text”.
U konstruktoru komponente testiramo je li komponenta tipa “text” i koristimo fillText metodu umjesto fillRectmetode.
Napokon u funkciju updateGameArea dodajemo kod koji zapisuje rezultat na platno. frameNo svojstvo koristimo za brojanje rezultata.
function updateGameArea() {
var x, height, gap, minHeight, maxHeight, minGap, maxGap;
for (i = 0; i < myObstacles.length; i += 1) {
if (myGamePiece.crashWith(myObstacles[i])) {
myGameArea.stop();
return;
}
}
myGameArea.clear();
myGameArea.frameNo += 1;
if (myGameArea.frameNo == 1 || everyinterval(150)) {
x = myGameArea.canvas.width;
minHeight = 20;
maxHeight = 200;
height = Math.floor(Math.random()*(maxHeight-minHeight+1)+minHeight);
minGap = 50;
maxGap = 200;
gap = Math.floor(Math.random()*(maxGap-minGap+1)+minGap);
myObstacles.push(new component(10, height, “green”, x, 0));
myObstacles.push(new component(10, x – height – gap, “green”, x, height + gap));
}
for (i = 0; i < myObstacles.length; i += 1) {
myObstacles[i].speedX = –1;
myObstacles[i].newPos();
myObstacles[i].update();
}
myScore.text = “SCORE: “ + myGameArea.frameNo;
myScore.update();
myGamePiece.newPos();
myGamePiece.update();
}
Primjer:
Kako bi se bodovi brojili dodali smo slijedeći kod u “updateGameArea” funkciju. Kod će biti pozvan svake nove nacrtane sličice te će ih frameNo brojati.
myGameArea.frameNo += 1; myScore.text = “SCORE: “ + myGameArea.frameNo; myScore.update();
6. Ugradnja slike u igru
Za dodavanje slika na platno objekt getContext (“2d”) ima ugrađena svojstva za ugradnju slika. Umjesto boje i oblika našeg lika, upisujemo url slike koju želimo ubaciti u igru.
function startGame() {
myGamePiece = new component(30, 30, “smiley.gif”, 10, 120, “image”);
myGameArea.start();
}
U konstruktoru komponenata testiramo je li komponenta tipa “image” i kreiramo objekt slike pomoću ugrađenog konstruktora objekta “new Image ()”. Kada smo spremni za crtanje slike, koristimo metodu drawImage umjesto metode fillRect.
function component(width, height, color, x, y, type) { this.type = type; Primjer:
if (type == “image”) {
this.image = new Image();
this.image.src = color;
}
this.width = width;
this.height = height;
this.speedX = 0;
this.speedY = 0;
this.x = x;
this.y = y;
this.update = function() {
ctx = myGameArea.context;
if (type == “image”) {
ctx.drawImage(this.image,
this.x,
this.y,
this.width, this.height);
} else {
ctx.fillStyle = color;
ctx.fillRect(this.x, this.y, this.width, this.height);
}
}
}
7. Dodavanje zvuka
Kako bi dodali zvuk u igru potrebno je upotrijebiti HTML5 <audio> element za dodavanje zvuka ili glazbe.
Primjer (kada crveni kvadratić udari u prepreku glazba se pokreće)
function sound(src) {
this.sound = document.createElement(“audio”);
this.sound.src = src;
this.sound.setAttribute(“preload”, “auto”);
this.sound.setAttribute(“controls”, “none”);
this.sound.style.display = “none”;
document.body.appendChild(this.sound);
this.play = function(){
this.sound.play();
}
this.stop = function(){
this.sound.pause();
}
}
Da bismo u igru dodali pozadinsku glazbu, dodajemo novi zvučni objekt i neka se glazba reproducira kada započnemo igru. var myGamePiece; var myObstacles = []; function startGame() {
var mySound;
var myMusic;
myGamePiece = new component(30, 30, “red”, 10, 120);
mySound = new sound(“bounce.mp3”);
myMusic = new sound(“gametheme.mp3”);
myMusic.play();
myGameArea.start();
}
8. Dodavanje utjecaja gravitacije
Neke igre imaju sile koje komponentu igre vuku u jednom smjeru, poput gravitacije koja vuče predmete na tlo. Da bismo dodali ovu funkcionalnost u naš konstruktor komponenata, prvo dodajemo gravity svojstvo koje postavlja trenutnu gravitaciju. Zatim dodajte gravitySpeed svojstvo, koje se povećava svaki put kad ažuriramo okvir.
function component(width, height, color, x, y, type) {
this.type = type;
this.width = width;
this.height = height;
this.x = x;
this.y = y;
this.speedX = 0;
this.speedY = 0;
this.gravity = 0.05;
this.gravitySpeed = 0;
this.update = function() {
ctx = myGameArea.context;
ctx.fillStyle = color;
ctx.fillRect(this.x, this.y, this.width, this.height);
}
this.newPos = function() {
this.gravitySpeed += this.gravity;
this.x += this.speedX;
this.y += this.speedY + this.gravitySpeed;
}
9. Odbijanje od prepreke
Još jedno svojstvo koje možemo dodati uz gravitaciju je bounce svojstvo. Bounce svojstvo određuje hoće li komponenta odskočiti kada padne na kraj canvasa. Vrijednost svojstva uvijek mora biti 0 ako ne želimo imati odskakanje i 1 ako želimo da odskoči natrag do originalne lokacije.
function component(width, height, color, x, y, type) {
this.type = type;
this.width = width;
this.height = height;
this.x = x;
this.y = y;
this.speedX = 0;
this.speedY = 0;
this.gravity = 0.1;
this.gravitySpeed = 0;
this.bounce = 0.6;
this.update = function() {
ctx = myGameArea.context;
ctx.fillStyle = color;
ctx.fillRect(this.x, this.y, this.width, this.height);
}
this.newPos = function() {
this.gravitySpeed += this.gravity;
this.x += this.speedX;
this.y += this.speedY + this.gravitySpeed;
this.hitBottom();
}
this.hitBottom = function() {
var rockbottom = this.gamearea.canvas.height – this.height;
if (this.y > rockbottom) {
this.y = rockbottom;
this.gravitySpeed = -(this.gravitySpeed * this.bounce);
}
}
}
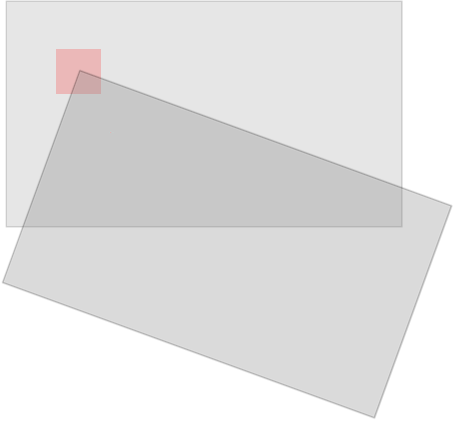
10. Rotacija elemenata
Kako bismo rotirali komponente, moramo promijeniti način na koji crtamo komponente. Jedina metoda rotacije dostupna za element platna rotirat će cijeli canvas:
Sve ostalo što nacrtate na platnu također će se rotirati, a ne samo određena komponenta.
Zbog toga je potrebno izvršiti neke promjene u metodi update ():
Prvo spremamo trenutni objekt konteksta platna:
ctx.save ();
Zatim pomičemo cijelo platno u središte određene komponente, koristeći metodu prevođenja:
ctx.translate (x, y);
Zatim izvodimo željenu rotaciju metodom rotate ():
ctx.rotate (kut);
Sada smo spremni nacrtati komponentu na platno, ali sada ćemo je nacrtati s središnjim položajem na položaju 0,0 na prevedenom (i rotiranom) platnu:
ctx.fillRect (širina / -2, visina / -2, širina, visina);
Kada završimo, moramo vratiti objekt konteksta natrag u njegov spremljeni položaj, koristeći metodu vraćanja:
ctx.restore ();
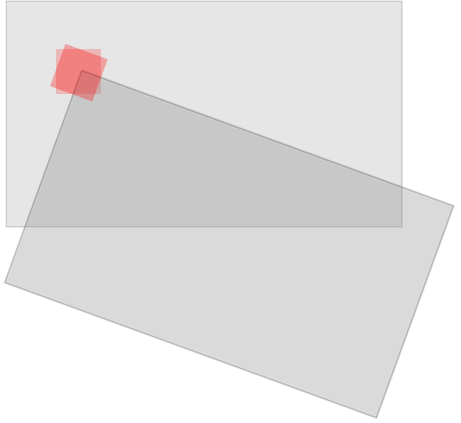
Komponenta je jedina stvar koja se rotira:
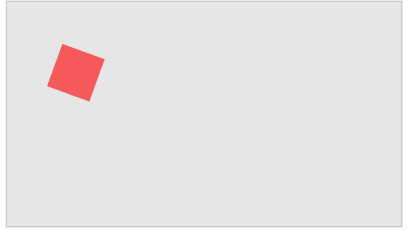
11. Pomicanje objekata
Kako bismo pomicali objekte, konstruktoru komponente dodajemo svojstvo brzine koja predstavlja trenutnu brzinu komponente. Također pravimo promjene u metodi newPos() kako bismo izračunali položaj komponente na temelju brzine i kuta. Prema zadanim postavkama komponente su okrenute prema gore, a postavljanjem svojstva brzine na 1, komponenta će se početi pomicati naprijed.
Primjer: function component(width, height, color, x, y) { Okretanje (moveAngle): function component(width, height, color, x, y) {
this.gamearea = gamearea;
this.width = width;
this.height = height;
this.angle = 0;
this.speed = 1;
this.x = x;
this.y = y;
this.update = function() {
ctx = myGameArea.context;
ctx.save();
ctx.translate(this.x, this.y);
ctx.rotate(this.angle);
ctx.fillStyle = color;
ctx.fillRect(this.width / –2, this.height / –2, this.width, this.height);
ctx.restore();
}
this.newPos = function() {
this.x += this.speed * Math.sin(this.angle);
this.y -= this.speed * Math.cos(this.angle);
}
}
this.width = width;
this.height = height;
this.angle = 0;
this.moveAngle = 1;
this.speed = 1;
this.x = x;
this.y = y;
this.update = function() {
ctx = myGameArea.context;
ctx.save();
ctx.translate(this.x, this.y);
ctx.rotate(this.angle);
ctx.fillStyle = color;
ctx.fillRect(this.width / –2, this.height / –2, this.width, this.height);
ctx.restore();
}
this.newPos = function() {
this.angle += this.moveAngle * Math.PI / 180;
this.x += this.speed * Math.sin(this.angle);
this.y -= this.speed * Math.cos(this.angle);
}
}
12. Primjeri igara
https://play.famobi.com/gold-mine
https://tutorialzine.com/2015/02/30-amazing-games-made-only-with-html5